

Introduction
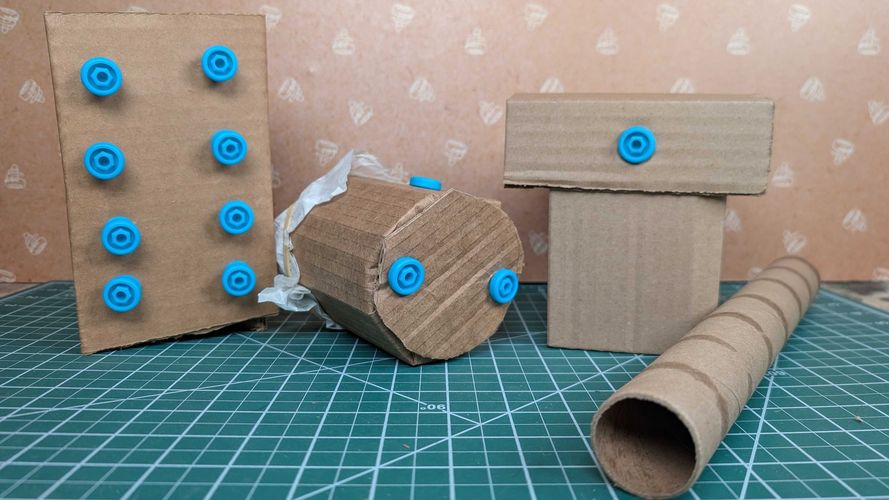
Design. Build. Jam!
Turn your classroom into a musical workshop! In this hands-on multi-session unit, students use Makedo tools and upcycled cardboard to engineer their own musical instruments. From visualising vibrations with rubber bands to exploring the "voice" of cardboard percussion, young builders will investigate how physical properties transform into the music we hear. It’s a perfect harmony of physics, engineering, and artistic performance.
Subjects
Music, Art, Design and Technology, Science, Literacy
Objectives

Preparation
Student Materials
Upcycled cardboard
Rubber bands
Markers and craft Supplies
Cardboard tubes
Printable: Composition Challenge Card
Teacher Resources
Teacher-created example
Teacher Slides: Musical Instruments and Sound
Shoebox for each student (request students bring from home)
Lesson Steps
3 X 45 minute sessions
Session 1: Vibration, Pitch and Frequency
Warm-up (10 min)
Activity: Build a Stringed Instrument (30 min)
Reflection (5 min)
Session 2: Percussion, Beat and Tempo
Warm-up (5 min)
Activity: Percussion, Beat, Tempo (30 min)
Performance (8 min)
Session 3: Grand Finale: Timbre, Dynamics, and Instrument Families
Warm-up (5 min)
Activity: Timbre, Dynamics, Instrument Families (30 min)
Active Listening Performance (5 min)
Reflection (5 min)
Session 1: Vibration, Pitch, and Frequency
The first session focuses on getting students to see sound! Students will learn about how vibration, pitch and frequency all play a part in what you hear!
Warm-up
Time allocated: 5-10 minutes
Big Idea: If you make a stringed instrument from cardboard and rubber bands, can you make it play different pitches?
Feel sound: Start by having students place their hand lightly on their throat and hum. Then ask them to change pitch and notice how the vibration changes.
Hear sound: Have each student stretch a rubber band and pluck it. What do they notice? Discuss.
Discuss key concepts: Vibration, pitch, and frequency
Establish that sound IS vibration, and that the faster the vibration and the higher the frequency, the higher the pitch will be. Conversely, the slower the vibration and the lower the frequency, the lower the pitch. This is visible with the rubber band.
See sound: Take a 6-inch rubber band, ask students to stretch it between their hands, and pluck it. Then pull tighter and pluck again! Have them adjust the width of their hands as they pluck to actually SEE and hear how the sound (vibration) changes. They can see that the slower the rubber band moves, the lower the frequency and the pitch. Whereas a higher pitch has a higher frequency and vibration.
Session 1: Activity
Time allocated: 30 minutes
Why do orchestras have more than one kind of instrument? What would be lost if everything sounded the same?
Session 2: Percussion, Beat and Tempo
The second session focuses on rhythm and beat and introduces the percussion family of instruments. Students will learn to make their own percussion instrument to prepare for the next and final session.
Warm-up
Time allocated: 5
Big idea: Every material has a voice, and engineers listen before they build. Yesterday, we built stringed instruments, but today we will focus on beat and tempo to build percussion instruments!
Body percussion: Start with no materials and just teach beat and tempo with body percussion. Play the Steady Beat Game to introduce beats with clapping, stomping, and knee pats! This video shows different beats per minute so students can grasp how tempo changes when the beat is faster or slower. Discuss how the tempo can change the mood of the song. (Play a slow song and a fast song and ask students to discuss how the mood changes with the BPM.)
Session 2: Activity
Time allocated: 30 minutes
Session 3: Grand Finale: Timbre, Dynamics, and Instrument Families
This last session will tie together the concepts learned and encourage students to start thinking about how music sounds when multiple instruments play together. Students will learn about timbre, dynamics, and how instrumental families work together to create and play their own quick group composition.
Warm-up
Time allocated: 5 minutes
Big idea: For this last exploration of cardboard sound, the big idea is that a simple instrument keeps a beat, but an orchestra can tell a whole story!
Hook: Play the same simple rhythm three different ways for the class: Tap a cardboard tube on a hollow cardboard box, tap on a table, and scrape across a Makedo-created Scraper instrument. Ask students if the beat is the same (it is!). Then ask if it sounds the same played these three different ways (no!)
Timbre: Timbre is the sound quality of an instrument. Two main things affect the timbre of an instrument: the source of the vibration (string, air, etc.) and the shape of the instrument. Share sound bites of different instruments and ask students to describe each sound with adjectives. Write these words on the board to help them with descriptions: bright, dark, smooth, mellow, harsh, rich, thin, breathy, metallic
Session 3: Activity
Time allocated: 35 minutes
Reflection
Time allocated: 5 minutes
Have the students journal their responses to the following prompts:
Why do orchestras have more than one kind of instrument? What would be lost if everything sounded the same?
How did you design your instrument to be both loud and quiet?
When your group played together, was it easy or hard to hear your own instrument? What did your group do to make sure every instrument could be heard?
Which was harder to perform: the very quiet parts (pianissimo) or the very loud parts (fortissimo)? Why?
What was your favourite part of this sound exploration, and why?
Extensions and Supports
Try A Subject-Aligned Activity
Science: Make a recording station. Use a tool like Audacity to view the waveforms of instruments. Record 10 seconds at a slow tempo and 10 seconds at a fast tempo to compare waveforms.
Science: Create a Spectrogram! Use Chrome Music Lab to see sound frequencies with the Spectrogram app. Open the Spectrogram and play the instrument to see how its frequency changes over time.
Math: Have students measure the length of their rubber bands and create a simple bar graph showing how the length correlates to pitch.
English/Literacy: Ask students to write a user guide for their instrument to practice procedural writing.
English/Literacy: Challenge students to write a short poem about their instrument’s sound, focusing on onomatopoeia. (E.g. thrum, twang, scrape, pop)
History and Social Sciences: Research the history of the percussion family. Students can look at African Talking Drums or Peruvian Cajóns and compare how these ancient designs used materials similarly to their cardboard build.
Cardboard and Tech: If you have Makey Makey kits, students can turn their instruments into a musical controller!
Further Resources
Alignment to Standards
These standards are highly relevant to this activity. For a complete list, please refer to the framework websites. This list can be tailored for your class.