A perfect match
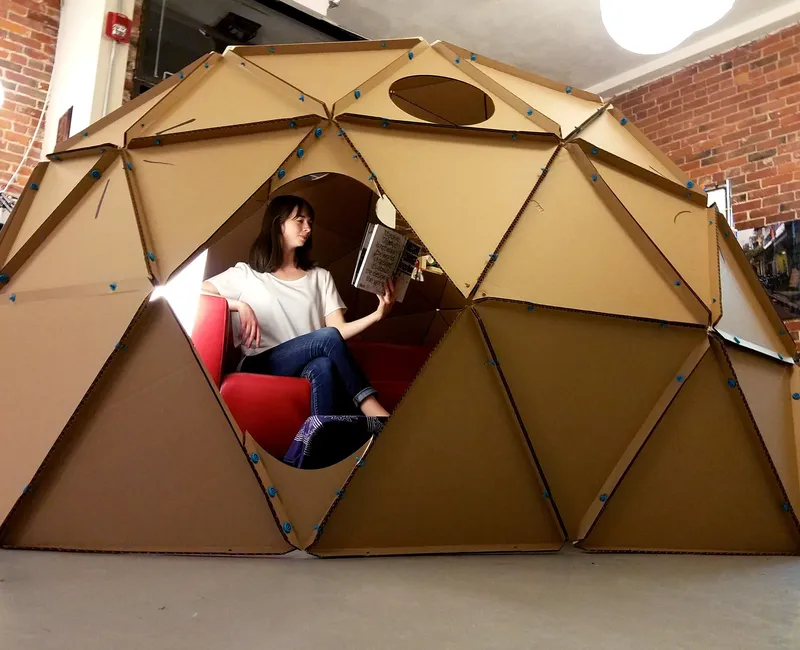
The Geodesic Dome is a challenging but wonderfully satisfying Makedo construction project. This structure in particular gives a clear example of how to best make use of the strengths that are inherent in strategically folded cardboard, and also the robust connections that are created by the Makedo Scru connector.
Thanks to the talented team from Design That Matters.
Are you ready to get technical? We hope so! The following text outlines the process for calculating your panel sizes when making a dome out of cardboard and Makedo.
Important Note on Panels:
Most makers will use the 2V or 3V format when calculating panels. For this example, we have used the 3V calculator from Geo Dome. It's a very handy resource, and they also provide a 2V calculator if that suits your preferences. Just be aware that because we are making the dome out of panels connected along their edges, you can ignore the mention of "hubs" in the calculator output.
Our example dome is set at 3000mm in diameter. Be prepared, domes require a lot of cardboard!
Part 1: Calculating Panel Dimensions for a 3V Geodesic Dome
To design a 3V geodesic dome, you'll need to calculate the lengths of the three types of edges for your cardboard panels. A 3V dome uses three edge lengths, commonly referred to as "A", "B", and "C". These result in two different triangles that are repeated to make up your dome.
The first step is to calculate these dimensions, and then make a scaled-down model for testing. That way you can be sure you're on the right track before cardboard cutting begins.
Determine the Dome Radius (R):
The "diameter" of a geodesic dome typically refers to the chord diameter, which is the distance between two opposite points on the base of the dome.
If your dome has a diameter of 3000mm, then:
R=Diameter/2
R=3000mm/2 = 1500mm
Understanding the 3V Dome Triangles
The 3V dome uses two types of triangular panels:
Type 1 (AAB Triangle): Two sides are length 'A', one side is length 'B'.
Type 2 (BCC Triangle): One side 'B', two sides are length 'C'.
You will need a specific number of each type of triangle depending on the portion of the sphere you are building (e.g., a half dome, 3/8 dome, 5/8 dome). For a common 5/8 sphere dome (a popular height):
AAB Triangles: 30 panels
BCC Triangles: 45 panels
Formulas for 3V Geodesic Domes:
For a 3V dome, the standard formulas for strut lengths (A, B, and C) in relation to the dome's radius (R) are:
These formulas are derived from geodesic dome geometry and are often expressed as factors multiplied by the dome radius. The 3V dome calculator linked above uses the following:
Strut Length A:
A=R×0.349Strut Length B:
B=R×0.404Strut Length C:
C=R×0.412
Calculations:
Using R=1500mm:
Strut Length A:
A=1500×0.349
A ≈ 524mmStrut Length B:
B=1500×0.404
B ≈ 606mmStrut Length C:
C=1500×0.412
C ≈ 618mm
Therefore, our 3V geodesic dome:
Length of "A" edges: Approximately 524 mm
Length of "B" edges: Approximately 606 mm
Length of "C" edges: Approximately 618 mm
You will need to cut out cardboard triangles with these side lengths. Ensure to add tabs or flaps to the cardboard panels for connecting them with Makedo Scrus. The dome will be stronger if the flaps are folded outwards, as shown in the image above. Each flap should be a minimum of 40mm wide to ensure structural strength and also provide enough space to connect the Makedo Scrus.
Note: Check your dome with a paper model first!
Part 2: Checking dimensions with a scale model
A paper model is a quick and easy way to check the dimensions of your panels. Using standard desktop printer paper, you can cut out the panels at a reduced scale and either glue, tape or staple them together to simulate the Makedo connectors.
Be sure that your scale is not too large or too small - a large scale could result in floppy paper panels, and a small scale may get too fiddly to assemble. We have had success using 1:4 scale, which in this example gives us a longest length (C) for our 3000mm dome of 618/4=155mm. This will fit nicely on standard printer paper.
To draw the triangles you can use a CAD program, or for an extra twist you can try plotting the shapes by hand. This triangle calculator can help with the angles.
When plotting or drawing your triangles, don't forget to allow space for the tabs! In the scale model, your tabs can be 5-10mm wide.
If you are working digitally, you can print the number of required triangles. For those ruling the shapes manually, make one each of the two triangles at 1:4 scale, and then use these as templates for the remaining panels (this is what we'll do at full scale as well).
Calculating 1:4 Scale Dimensions for the Paper Model
To get the 1:4 scale dimensions, we will divide each full-size dimension by 4, and then round to the nearest whole millimeter.
Calculate Scaled "A" Edge Length:
Full-size A: 524 mm
Divide by 4: 524 mm/4 = 131 mm
Calculate Scaled "B" Edge Length:
Full-size B: 606 mm
Divide by 4: 606 mm/4 = 152 mm
Calculate Scaled "C" Edge Length:
Full-size C: 618 mm
Divide by 4: 618 mm/4 = 155 mm
Summary of 1:4 Scale Dimensions:
Scaled "A" edge length: 131 mm
Scaled "B" edge length: 151 mm
Scaled "C" edge length: 155 mm
When drawing your triangles, don't forget to allow space for the tabs! In the scale model, your tabs can be 5-10mm wide. Make sure to cut small V-shaped relief cuts at the corners where the tabs meet the main triangle body, so they fold cleanly without bunching up.
Fold all the tabs along the edges of each cut-out triangle. Ensure the folds are crisp and straight.
Assembling the model
This is the most critical part, as it teaches you the construction logic. Geodesic domes follow specific connection patterns.
Refer to the diagram provided by the dome calculator.
Number of panels:
Assembly, front:
Assembly, top:
Tips:
Start with a Node (Vertex):
Begin by connecting triangles around a central point (a "vertex" or "node"). For our 3V dome, there are vertex nodes where five AAB triangles meet and also vertex nodes where six BCC triangles meet.
Refer to the diagrams above, paying attention to the colours.
Connect Edges:
Align the tabs of two adjacent triangles. Ensure you are connecting edges of the same length. An 'A' edge must always connect to another 'A' edge, a 'B' to a 'B', and a 'C' to a 'C'. This is paramount for the dome's structural integrity and correct form.
For the paper model, use two staples on each flap. For the full size cardboard panels, use 2x Makedo Scru.
Build Outwards:
Continue adding triangles, connecting them edge-to-edge, following the pattern from your chosen dome diagram. Work systematically from the base or a central point outwards.
Check Proportions and Fit:
As you build, carefully observe:
Do the tabs align correctly?
Are the angles looking right, forming a smooth curve?
Does the dome's curvature form smoothly without kinks?
Do the panels lie flat against each other without buckling or noticeable gaps?
Troubleshooting Tips:
Gaps or Overlaps:
Even with rounding, slight discrepancies can occur. If panels don't fit perfectly, re-check your measurements and cuts. Precision is key.
Buckling:
If the panel buckles, it might be due to incorrect angles, or you might be trying to force a connection where the lengths don't precisely match. Double-check your edge length pairings.
Getting Lost:
Geodesic domes can be complex to assemble. Refer constantly to your connection diagram. It's like a 3D jigsaw puzzle.
The 1:4 scale model, with dimensions rounded to the nearest millimeter, will provide invaluable insight into the construction of your full size 3V cardboard dome, allowing you to refine your cutting techniques and assembly strategy before tackling the full-sized project. Good luck!
Notes
Accuracy is Key:
With more struts and more complex connections, precision in cutting cardboard for a 3V dome is even more critical than for a 2V. Small errors can multiply.
Makedo Scru placement:
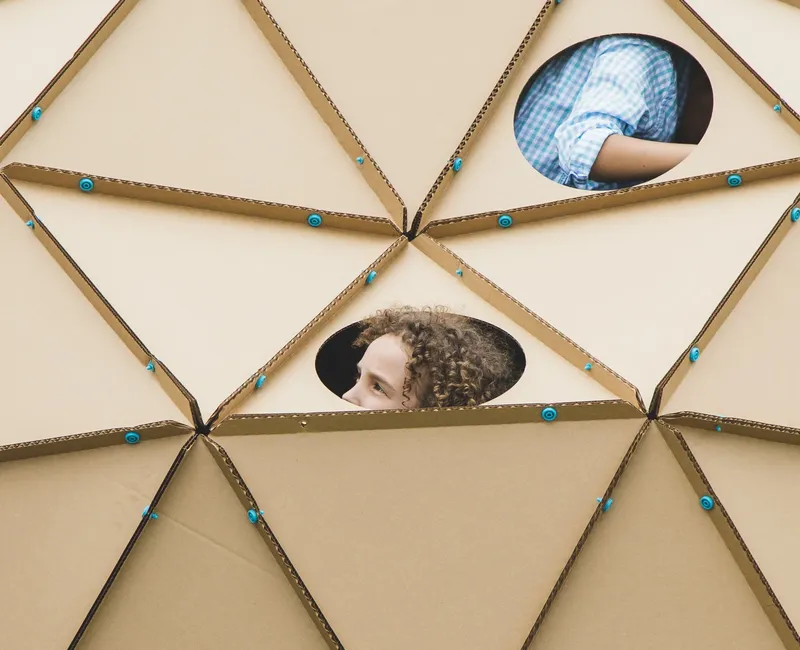
For a neater outcome, connect the Makedo Scrus at the same distance from the corners of each triangle. The repetition across the dome becomes an eye-catching detail.
Cardboard Strength:
For a 3m dome, use robust, thick cardboard to provide sufficient structural integrity.
Assembly Diagram:
Follow the dimensions and schematic provided by the dome calculator.
Label as you cut:
Clearly label your panels and edges as you measure and cut them, to make the assembly process smoother (and much easier!).
Prototyping: The small paper model is invaluable for understanding the assembly sequence before committing to the full-size cardboard. You can pre-fold the tabs on the paper model to simulate the flaps for Makedo connections.