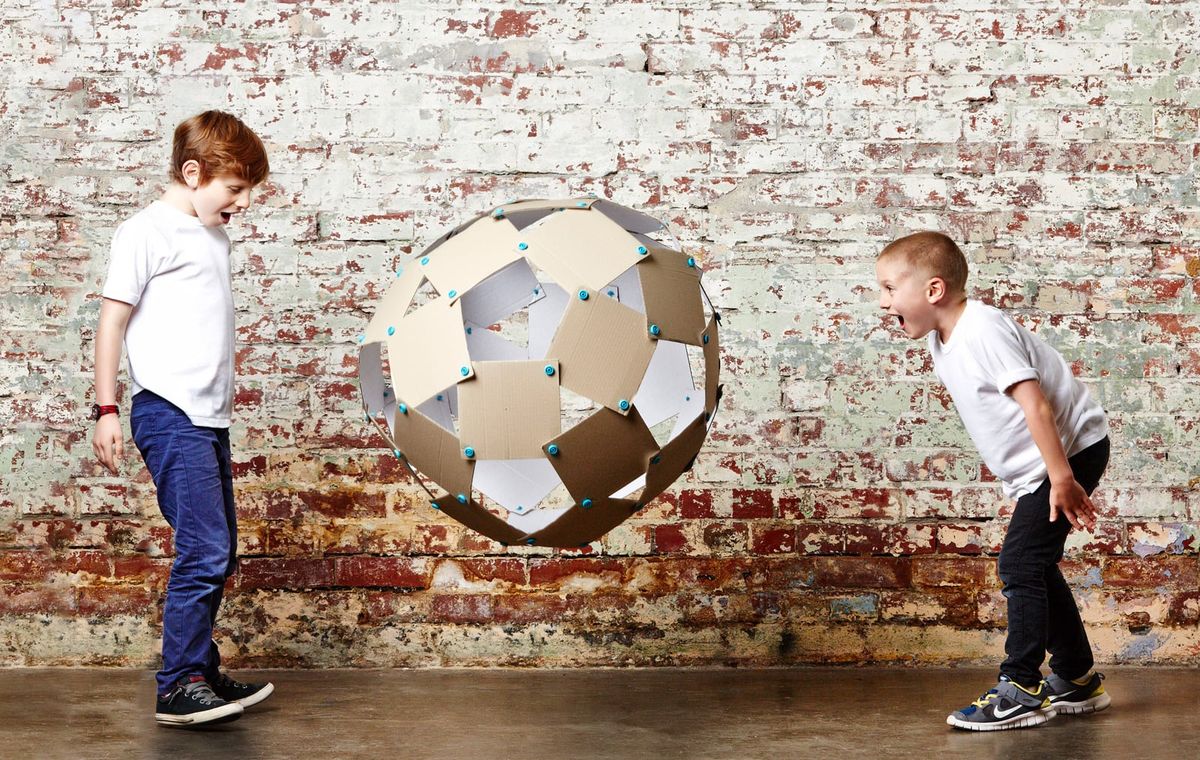
Time to tumble!
Follow this guide to learn how to make your own version of the Makedo Windball.
This is one of our all-time favourite creations. Not only is the outcome visually striking, it is also a robust and dynamic structure that can withstand physical play both indoors and out in the wild.
Introduction
Set your scale
The scale of your creation is entirely up to you - will your Windball be built from small squares, barely bigger than your own hand, or large panels 12-inches wide? Just be sure that you have enough cardboard in your collection. As you'll soon find out, there are a lot of squares to cut out!
To make the Windball, use the step-by-step guide below.
We've also included a handy video walkthrough that you can follow along with.
Video Walkthrough
Preparation
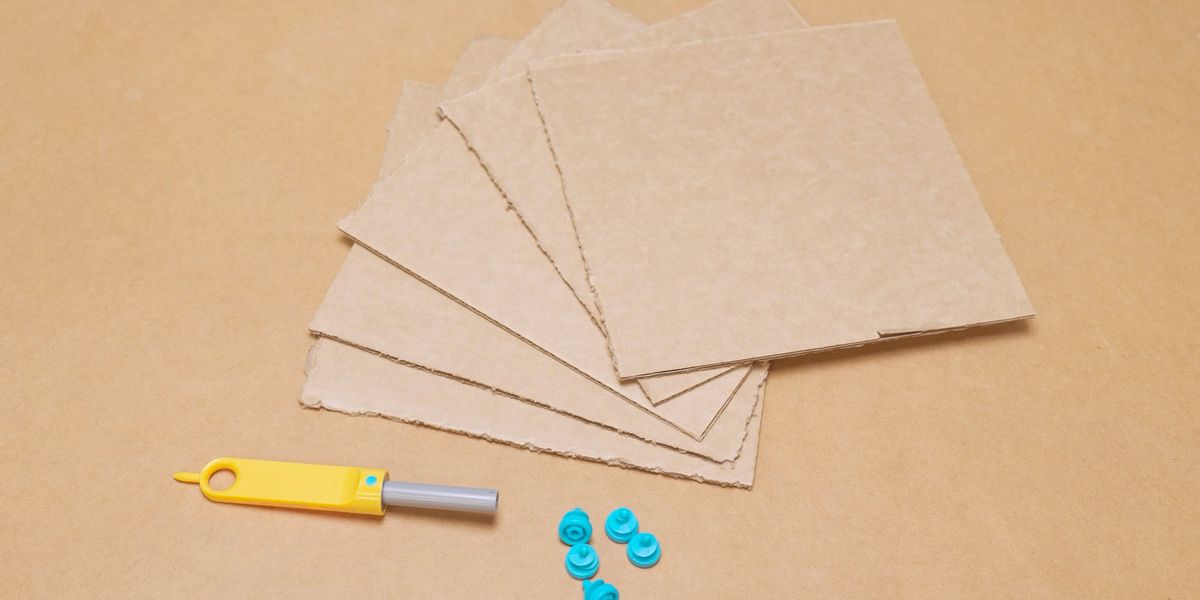
What you'll need
Scru-Driver Explore the range
Fold-Roller Explore the range
Safe-Saw Explore the range
60x Scrus or Scru+ Explore the range
Upcycled Cardboard
Find Cardboard
Source your materials
A recommended scale for squares that make up the Windball is about 20cm / 8in. This will be easier to manipulate when building and the final construction is big enough to have impact but not so large that you can't fit it through the doorway.
In the example here, we used one large moving box as the source cardboard. There is enough material in one box to complete the Windball, and the cardboard is nice and thick (so our Windball is tough enough to toss around afterwards!).

Insider Tip 1: Templates
Use your first square as a template
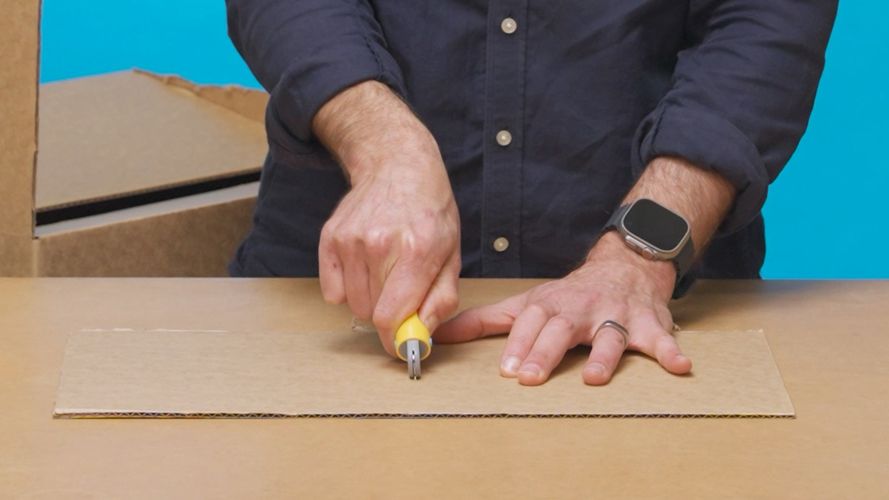
Once you have cut your first square, you can use it as a template for the other squares that need to be cut out.
Trace the outline of the first square with the Fold-Roller, and then cut along the dotted lines. This way you can ensure that you have identical sized squares of cardboard.


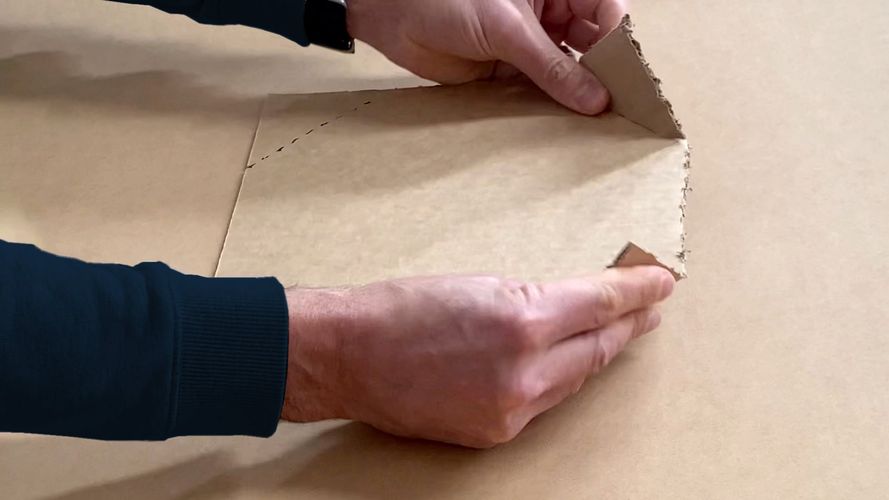
Insider Tip 2: Fold the corners
Round out the Windball
To help the flat squares form a rounded shape when connected, try making a fold line across each corner using the Makedo Fold-Roller.
Next, bend the corners up slightly along the fold lines. Do this for each square before you start connecting the individual pieces together.
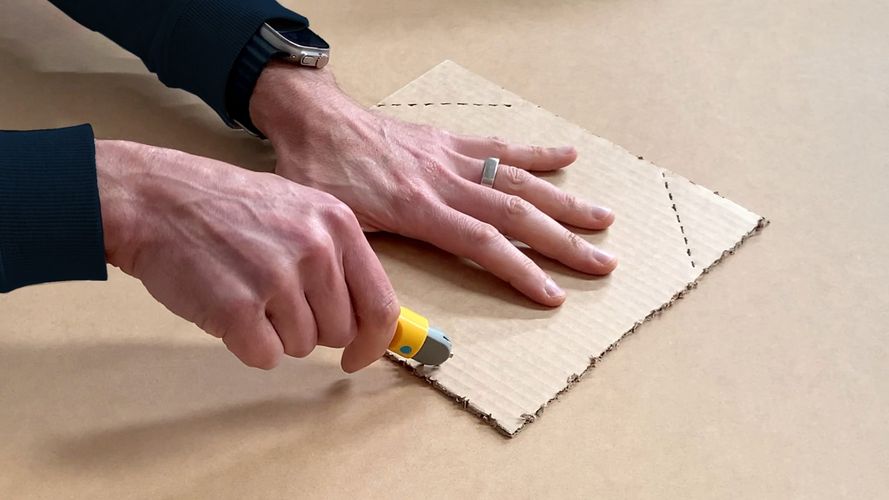
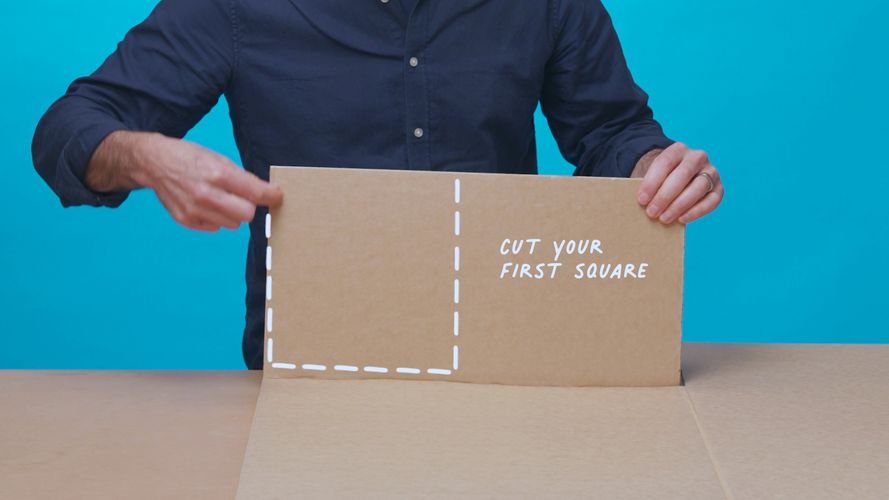
Step 1: Cut the squares
Count them carefully!
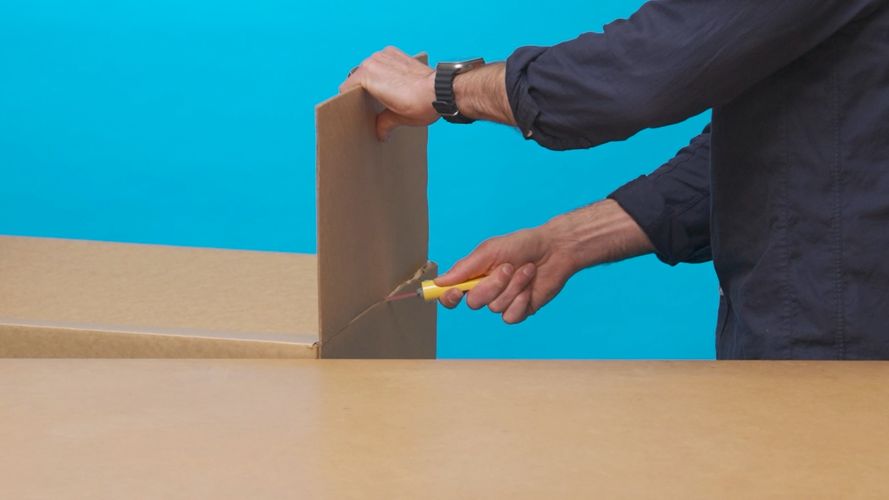
Measure out your first square, and then carefully cut it out using the Safe-Saw.
You can then use this square as a template for the other 29 that need to be cut out.
We recommend scoring a line with the Makedo Fold-Roller, and then cutting along this line with the Makedo Safe-Saw.
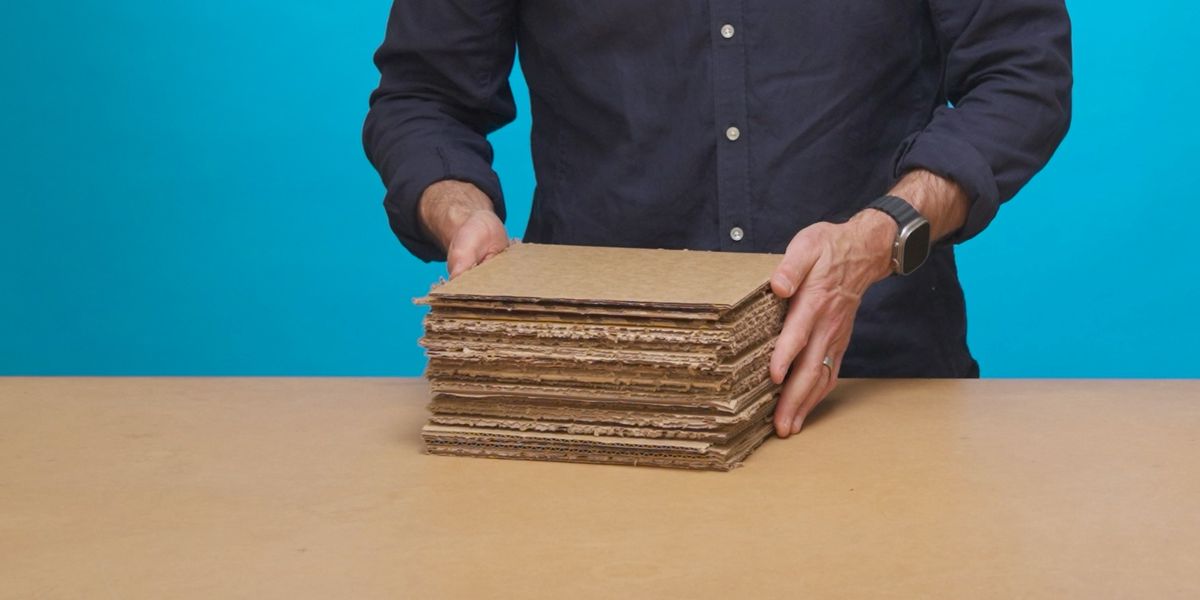
Repeat until you have a neat stack of 30x identical cardboard squares, ready for assembly.

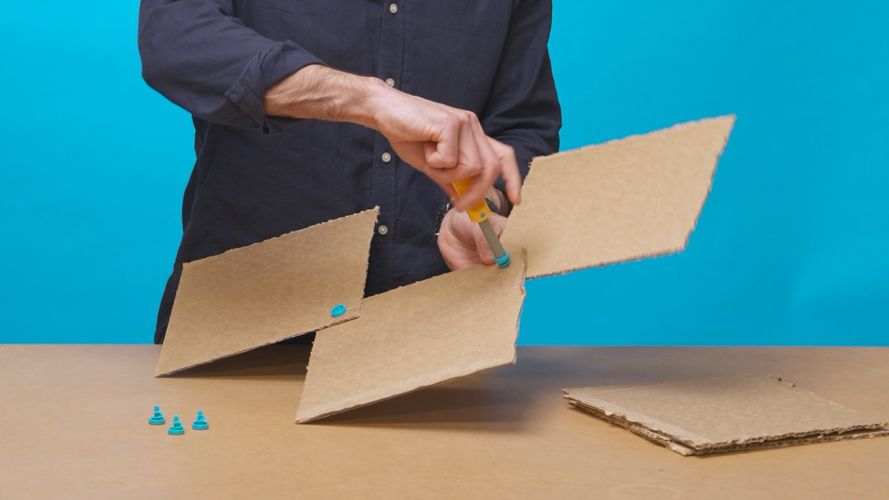
Step 2: Assembly begins
Start with 5x squares
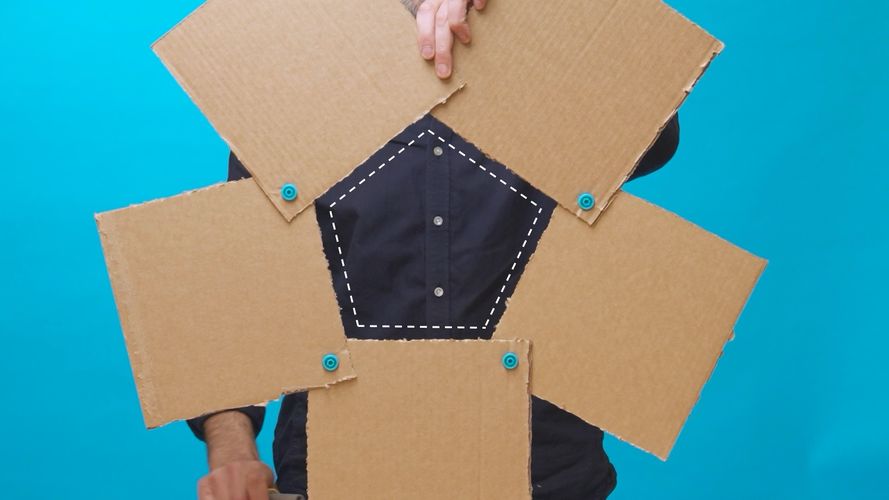
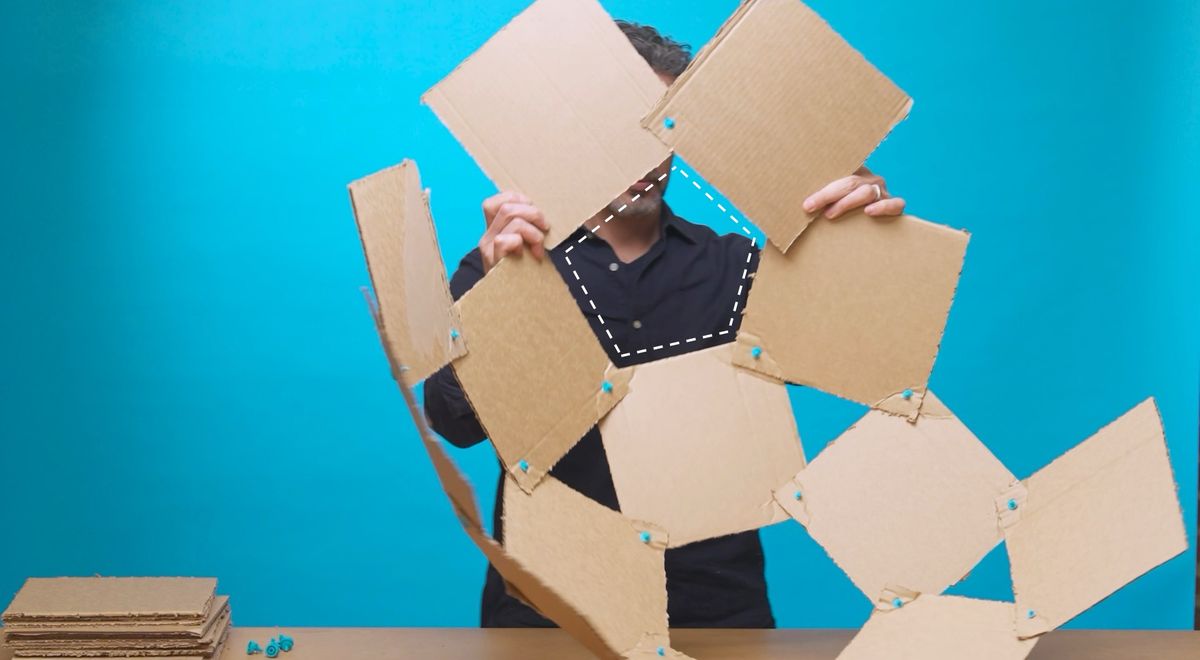
Begin your Windball assembly with 5x squares of cardboard.
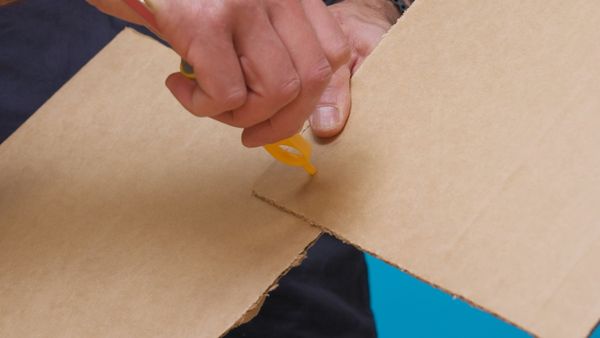
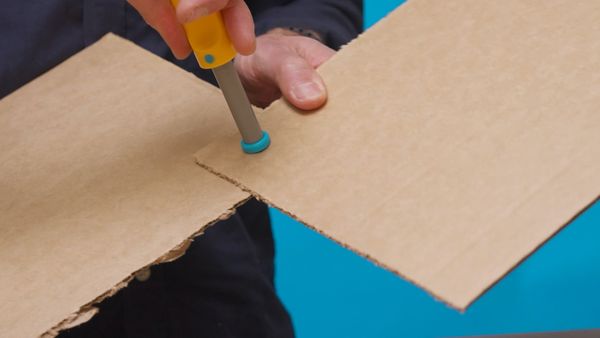
Overlap two squares at one corner, punch a hole and connect with a single Scru.
Look at the shape in the negative space
Connect the squares by overlapping at the corner, moving around in a circle.
Note how a five-sided pentagon is formed in the negative space between the squares. This is the start of a pattern that will continue through the Windball construction process.
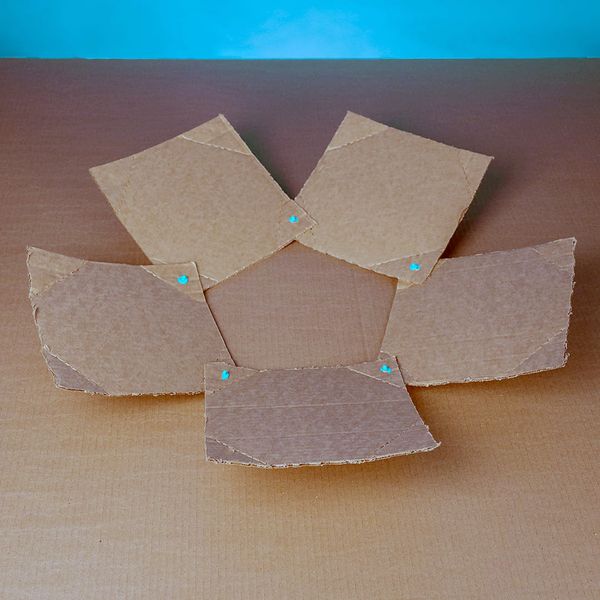
The first layer is complete
Your first layer will look like this. Try to manipulate the connections at the corners so that there is a slight bowl shape made by the five squares.
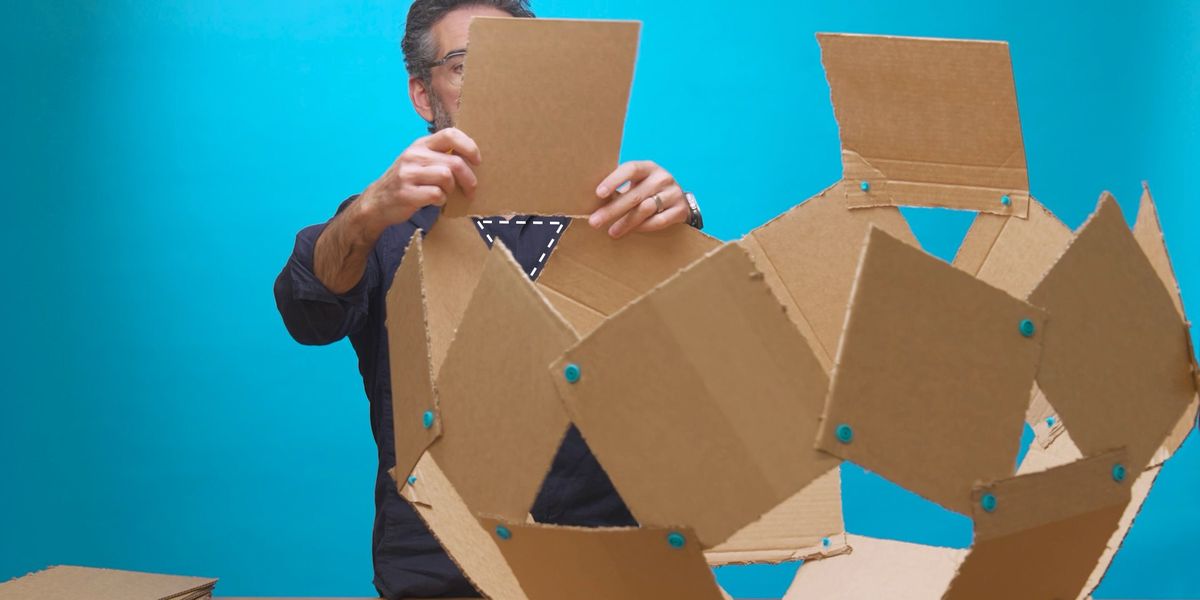
Step 3: Triangles
It's the negative space again!
Connect the squares in the second row so that small triangles form in the negative spaces.
Work your way around in a circle and you will see your Windball starting to take shape.

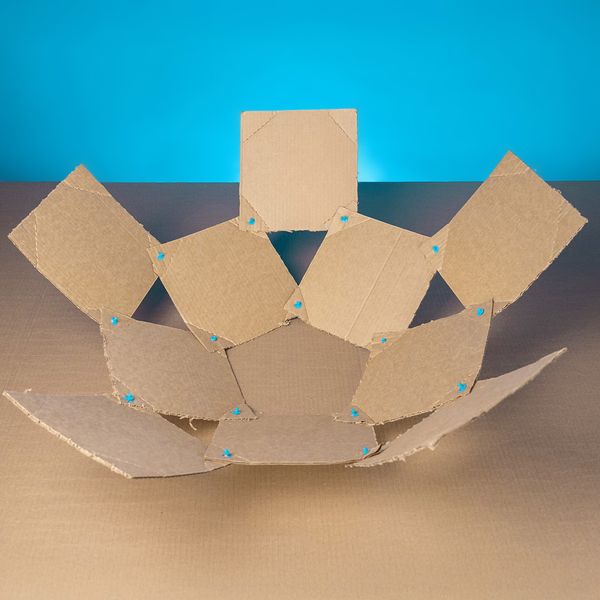
The second layer is complete
This is how your second layer will look, with triangles in the negative space.
Can you see the shape that is starting to form for the third layer?
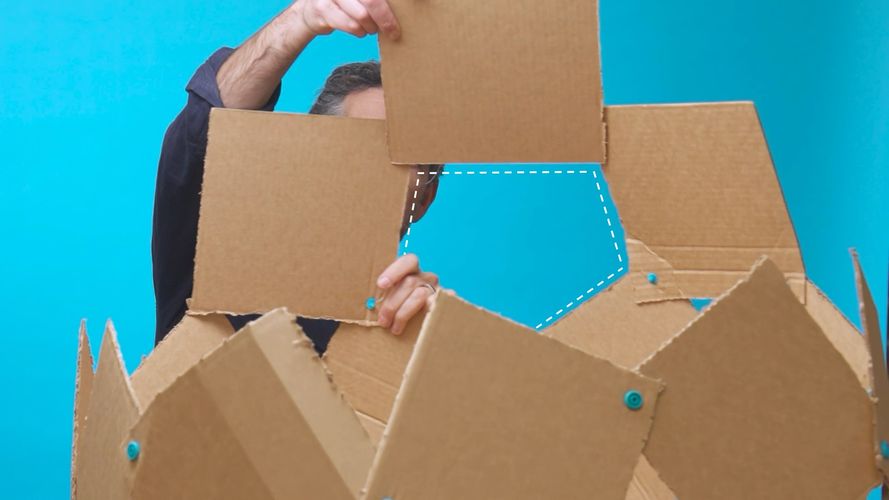
Step 4: Back to pentagons
Guided by the negative spaces
Next we connect the squares for the third layer. This will be the largest and widest layer on the Windball.
Connect two new squares at each open area to complete a pentagonal shape in the negative spaces. Move the Windball around as you go, working the structure into the form of an open bowl.
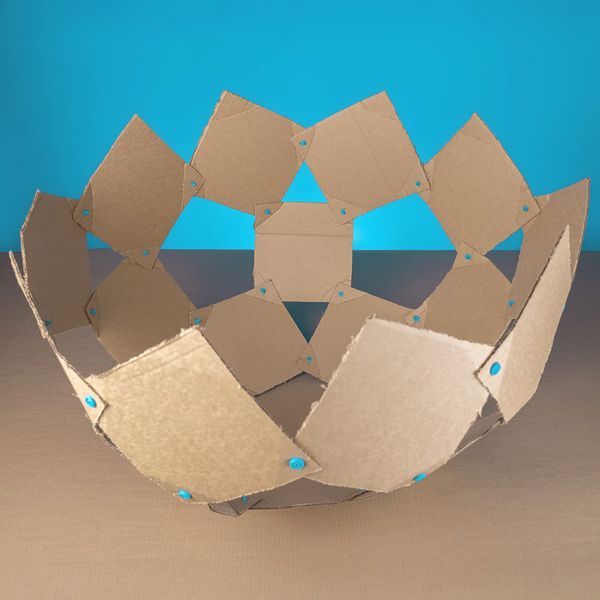
The third layer is complete
Your Windball will now have a neat round bowl shape, with quite a wide opening.
The pentagon and triangle pattern continues as the next layer of squares is added.
Step 5: Closing in
Triangles in the negative spaces
As you connect the squares in this layer, angle the sides inwards to encourage the round shape of the Windball.
Each square in this layer is connected to create a new triangle in the negative space. There will be 5x squares to add before moving to the next step.
The fourth layer is complete
Move your Windball around so that you can see the structure from different angles.
The shape can be adjusted if necessary, to keep the form neat and symmetrical.
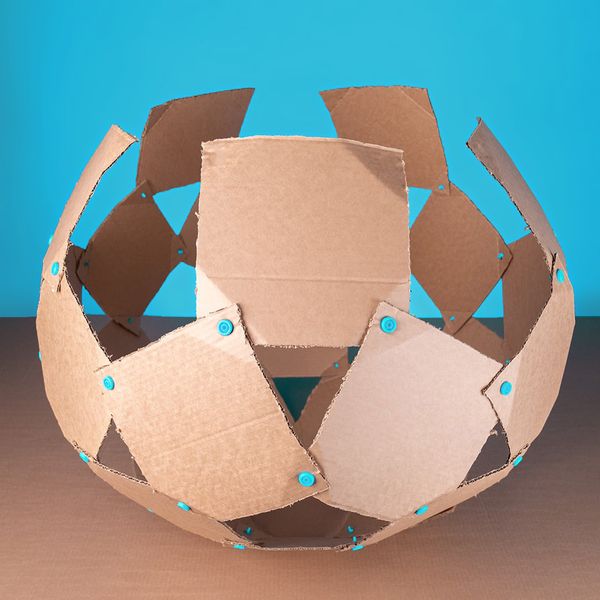
Step 6: Complete the sphere
Rounding out
The remaining squares are added here, following the pattern of triangles and pentagons.
Depending on the size of your squares, you may need to turn the Windball around as you connect the last few cardboard pieces.


Your Windball is complete!
Once you have attached all 30x cardboard squares, rotate the Windball and adjust the panels if necessary.
The goal is to have a neat round symmetrical sphere. How does your Windball look?
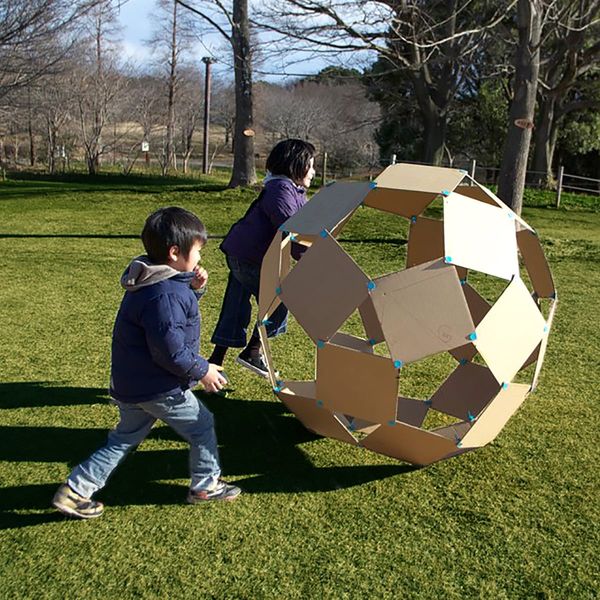
Time to play!
What will you do with your Windball?
How will you enjoy the cardboard Windball that you have made?
Here are a few ideas that we have seen from our global creative community:
Play a game of catch
Windball bowling
Windball races
Dress-ups (is your Windball big enough to climb inside?)
Windball pendant lamp
Windball table ornament
Windball kinetic sculpture