How to use a Triangular Brace
Triangles are one of the strongest shapes in construction, as they don’t distort or deform under pressure. This makes the triangular brace a powerhouse in cardboard engineering!
Add-On Triangular Brace
Simple and effective
This version of the triangular brace involves adding a separate piece of cardboard to your build for instant strength. This is the perfect solution for reinforcing a structure that is already standing or adding extra support exactly where you need it.
Triangle truss locked in place
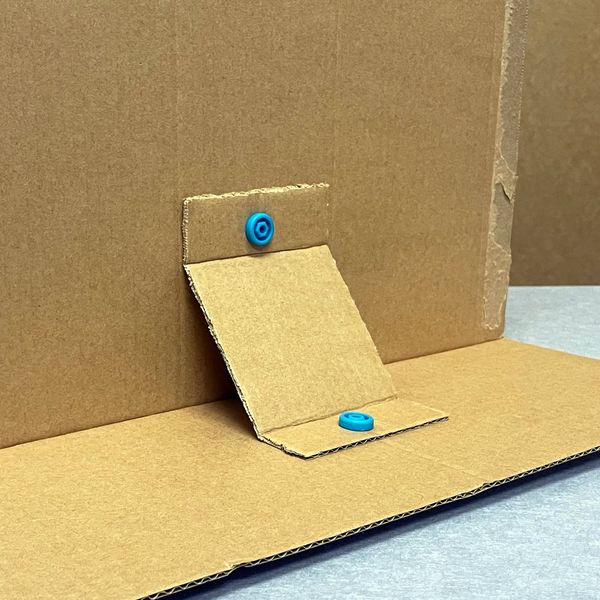
How it works: You can create a “truss” system by spanning the gap between a vertical panel and a horizontal panel with a diagonal piece. This creates a visible right-angle triangle that locks the two panels together.
Flute Direction: For maximum strength, your folds should run perpendicular to the cardboard flutes. When creating a brace, align the flutes so they "wrap" around the corner or junction. This usually means the flutes are aligned with the longer direction of a rectangular brace, providing a rigid support that resists bending.
The result: The strategic positioning of this brace adds remarkable strength to your cardboard creation! This bracing distributes the weight and prevents your creation from “racking” or leaning to one side.
Making it work
Square corner for strength
A triangular brace is only as effective as the geometric angle it maintains. For a brace to properly redirect downward force into the vertical wall, the horizontal and vertical panels must meet at a true 90-degree right angle. If the angle changes even slightly, it fights the brace rather than transferring the load through it, placing all the stress on your connectors instead of the material itself.
The Common Pitfall: It is very easy to overlook the importance of the right-angled triangle. If your diagonal strut doesn't create a neat square corner, the brace has no rigid geometry to "lock" into. Instead of holding the structure firm, the brace will collapse when pressure or weight is applied. It might look like a brace, but under load, the geometry fails.
Neat geometry works best
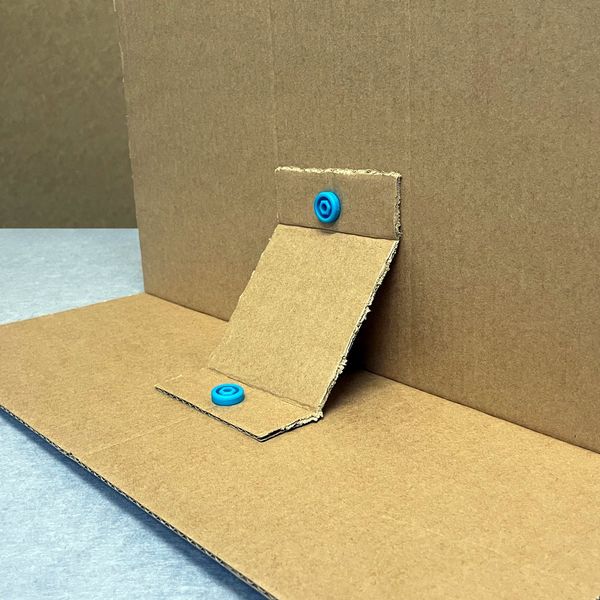
Tip: For the strongest connection, position the add-on brace so that it is the same distance from the fold on each surface. The resulting shape will be a right-isosceles triangle. This will ensure that force is distributed evenly, resulting in a strong, secure structure with very little vertical movement.
Tip: Before securing your Scrus in place, always check that the braced corner is square first. If this angle is too wide or too shallow, additional Scrus won't save the structure from collapsing.
The solution
The right-isosceles triangular brace
Watch short clip below to see a movement test on a corner with one triangular brace. Note that there is an equal distance from the corner junction to where the Scrus are connected, creating a triangle with two sides of equal length.
The right isosceles triangular brace gives even support in multiple directions.
Well supported
When there is an equal distance from the Scru to the corner junction on both surfaces, the result is a strong, stable connection with very little scope for movement.
Understanding flutes
Flute direction is important!
Plan your add-on triangular brace so that the folds are perpendicular to the flute direction.
If you don't plan ahead, you could find that your brace is not able to provide the support you had intended. Let's take a look at why flute direction is important, and observe what happens when the flutes are inline with the folds (not perpendicular) on the triangular brace.
Inline folds = flutes failing
Even before pressure is applied, the brace is weak, and the creased fold lines are ineffective.
When pressure is applied to the wall, the flutes in the cardboard brace collapse. The brace cannot support the wall.
Testing and Scru placement
What to avoid
The following video shows three triangular add-on braces that look ok at first glance, but each has an error that will result in a less effective support for the structure. In all three cases, the impact of these errors is that the wall is not held in place securely and can wobble from side to side (away from the vertical) easily.
What went wrong here?
The brace on the left has the bottom Scru too far away from the fold. This means that the brace lifts at the fold line when pressure is applied to the wall being supported.
The brace in the middle is attached further away from the fold on the base, and closer to the fold on the wall. Without even forces acting on the fold, there is less support and therefore more movement.
The brace on the right is the reverse of the middle one; it is attached closer at the base and further away from the fold at the wall. Once again, this uneven distribution of force means there is less support holding the wall vertical.
Take it further
Integrated Triangular Brace
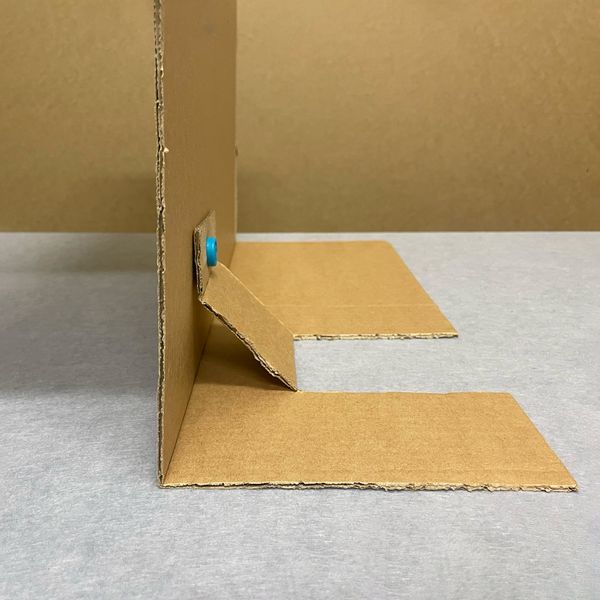
An integrated brace can be built directly into the structure itself. Instead of using separate components, the brace is formed by scoring and folding a single piece of cardboard from the existing structure, so that the vertical, horizontal, and diagonal elements are all part of a single continuous surface.
Why it works
Structural Continuity: Because the brace is an extension of the existing panel, the load is distributed across the surface rather than being concentrated at the Scru locations.
Streamlined Design: This approach creates a cleaner profile that can integrate smoothly with the rest of your build.
Efficiency: By using material already present in the structure to create the diagonal support, you achieve high-strength results with fewer Scrus.
The trade-off
This approach requires more "pre-construction" planning. Since the geometry is built-in, your measurements and fold lines must be precise from the start to ensure the resulting triangle is perfectly square.
Once again, the flute direction plays an important role!
See how to use the integrated triangular brace in this handy tutorial:
Brace in all directions
The triangular brace can be applied at any orientation, so be sure to experiment with your builds wherever you have a structure that needs support!
In the image below we can see a quick demonstration of one brace at the base and another placed underneath the shelf at the top.
Each brace is attached using only two Makedo Scrus. The result is a structure that is held in place with strength and precision.
Stronger structures
Build stronger, more stable creations with the triangular brace. Add-on braces are great for iterating and problem-solving on the fly; integrated braces reward a bit more upfront thinking with a tidier, more robust result.
From epic forts to ambitious vehicles, these right-angle trusses deliver professional-grade stability with cardboard's simplest geometry.