Get connected!
Ready to learn all about cardboard attachments? In this maker tip, you’ll learn a few of our favourite ways to make strong, secure joints and how to add stability when connecting cardboard.
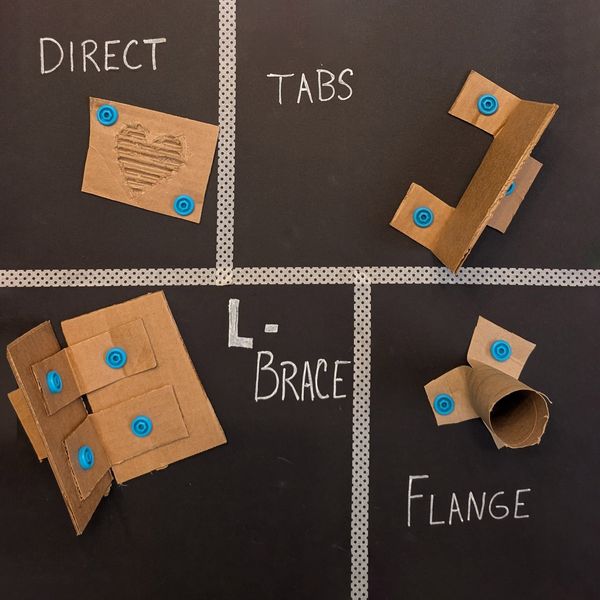
Method 1: Direct Connections
The most straightforward way to join cardboard
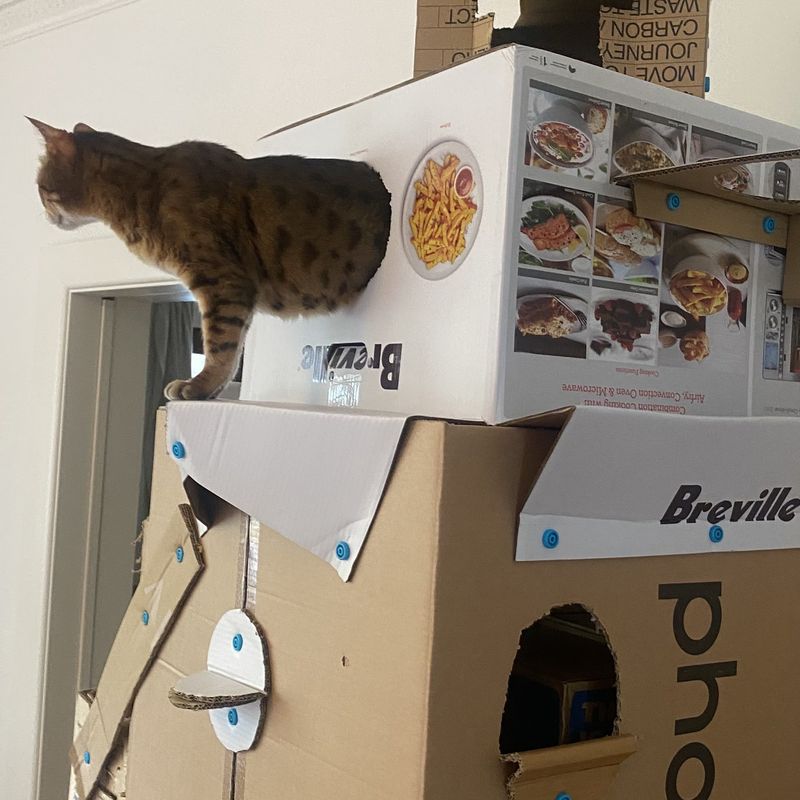
A direct connection involves overlapping two flat panels (such as stacking one box atop another or applying a patch) and securing them where the surfaces meet. It is the quickest way to build volume, extend the reach of your material and add detail.
This is a fundamental cardboard construction technique that will be used in almost every creation. Direct connections are where the Makedo Scrus are in a league of their own!
Tips for direct connections
Stronger together: Connecting flat panels adds strength, particularly when the cardboard flutes are in different directions.
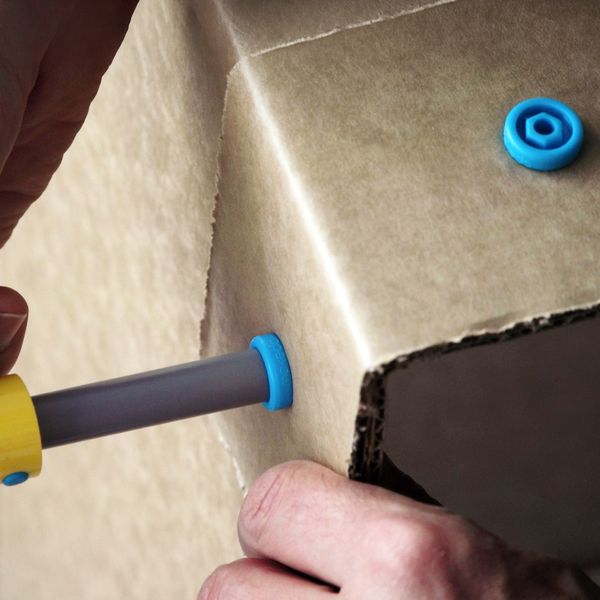
Support from behind: When punching a hole for the Scru and when connecting, support the cardboard from behind to prevent bending or unwanted folds.
Reposition if required: If something doesn't look right, it's easy to undo the Scru connectors and reposition your cardboard, then reattach for a greater impact.
Plan the layout: Before placing your first Scru, decide how many connectors the join will need. One in the center? One at each end?
Less is more: It's amazing how much just one or two Scrus can hold! There's no need to attach additional Scrus if the connection is already secure.
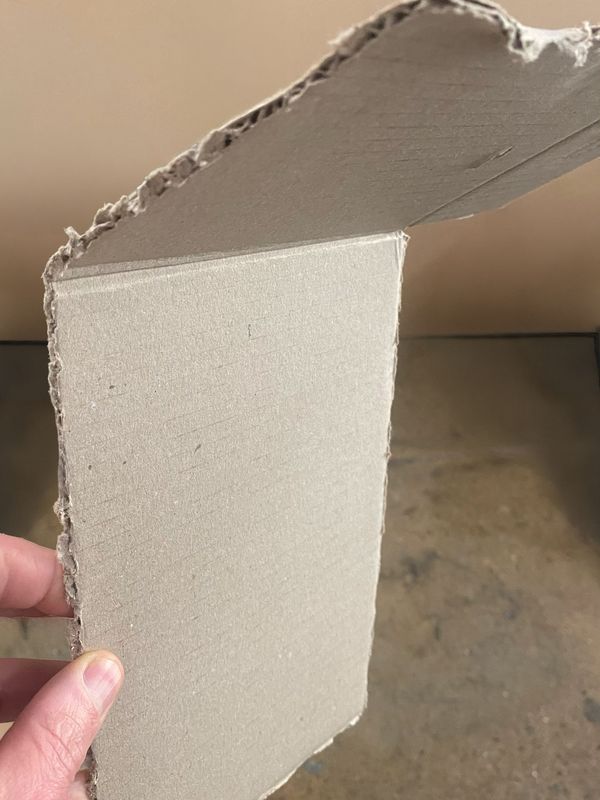
Method 2: Create cardboard brackets (L Brace)
Stronger corners
This reinforcement works best at corners and joints that meet at a right angle. It adds strength and stability to connections.
Tips for brackets
Mark the line: Use the Fold-Roller to mark your fold line.
Use an edge: Fold cardboard over an edge for more precision and control.
Keep it strong: Make the fold perpendicular to the flutes for stronger brackets.
Flute direction: Fold across (perpendicular to) the flutes for strong, structural corners.
Method 3: Add tabs to designs
Built-in stability
Tabs are a great, stable alternative to cardboard connections, allowing the maker to hide their work. This method works best when the maker adds the tab to the design before cutting. This is also a good method for adding a creation to a base and using opposing forces to add stability to the connection.
Tips for tab connections
Add tabs for connections: Join cardboard by adding tabs to your design.
Opposing forces: Tabs can also be created by bending legs in opposite directions to improve balance.
Need reinforcement? Cut tabs to help join cardboard pieces.
Use tabs: Attach reinforcements to corners or joints in your structures by using tabs.
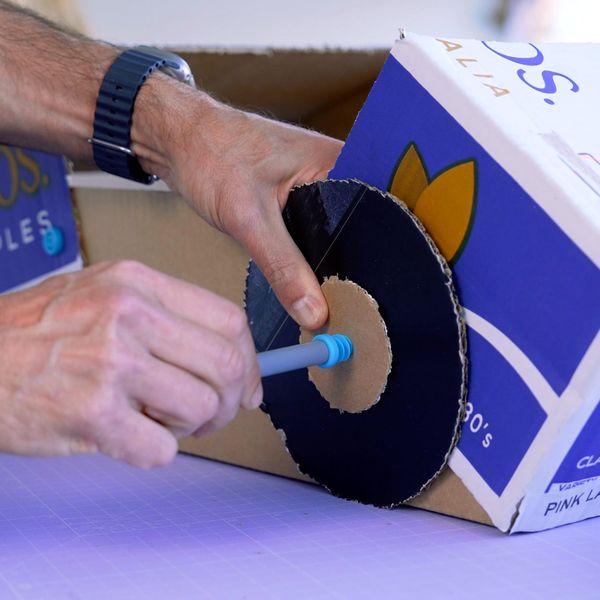
Method 4: Incorporate the Flange Method
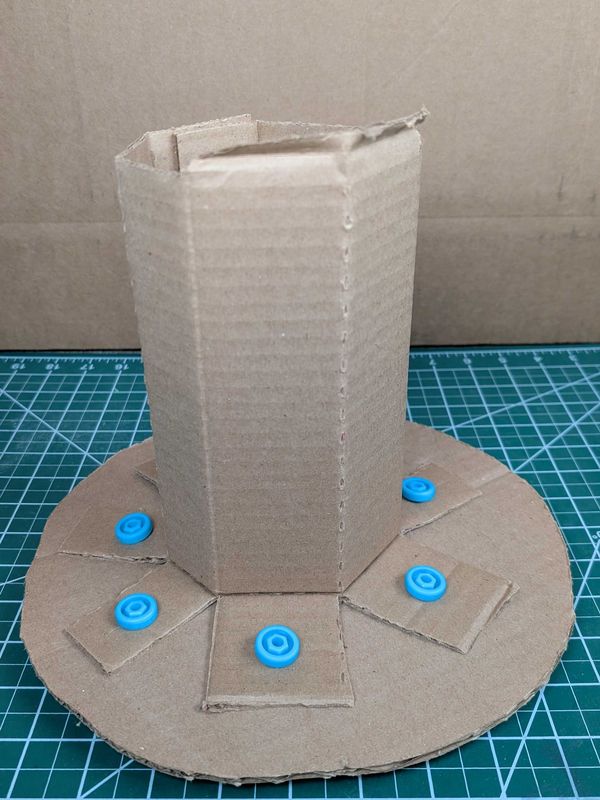
Building out and up
The flange method works best with cardboard tubes and for connecting a circular piece of cardboard using tabs. It’s a great way to build out from the main structure, creating taller, wider or longer sections that really give your creation impact. Some like to use this technique to add pillars or build a coliseum!
Tips for flange connections
Keep it even: Cut flanges with a Safe-Saw, depending on the width.
Use an edge: Fold cardboard over an edge for more precision and control.
Keep it strong: Where possible, fold perpendicular to the flutes for stronger brackets.
How many flanges? Test your design to see whether 2, 3, or 4 work better.
Method 5: Ribs and Patches
Level up!
Need to level up your skills for stronger builds? Check out these maker tips to add stability to your creations.
Add Support with Patches
Sometimes your cardboard project just needs a little love before you send it to the scrap yard! If you need a quick fix, try adding a little patch.
Add a patch: Did your cardboard creation bend or lose structure? Use a cardboard patch to strengthen your build.
Strengthen it: Make sure the flutes on the patch are perpendicular to those on the panel being supported.
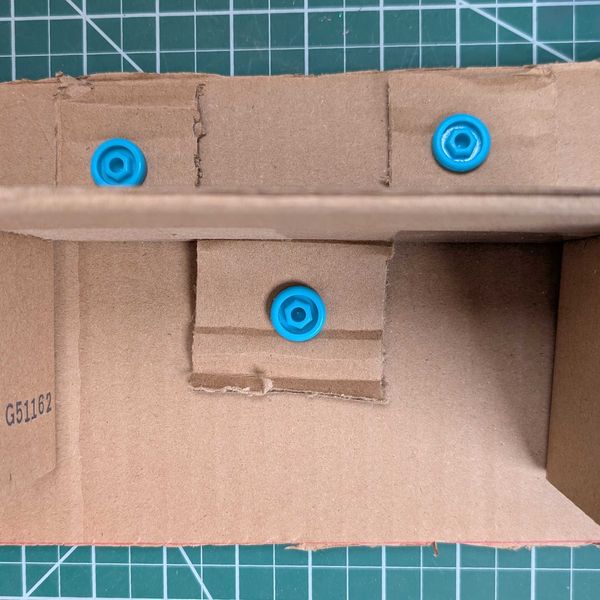
Adding Strong joints: Flat Folded Ribs
Ribs can be a quick and easy way to strengthen weakened or collapsing cardboard. The idea is similar to the technique of adding a patch with flutes perpendicular, but if we use a rib, it will be much stronger!

Folding the rib
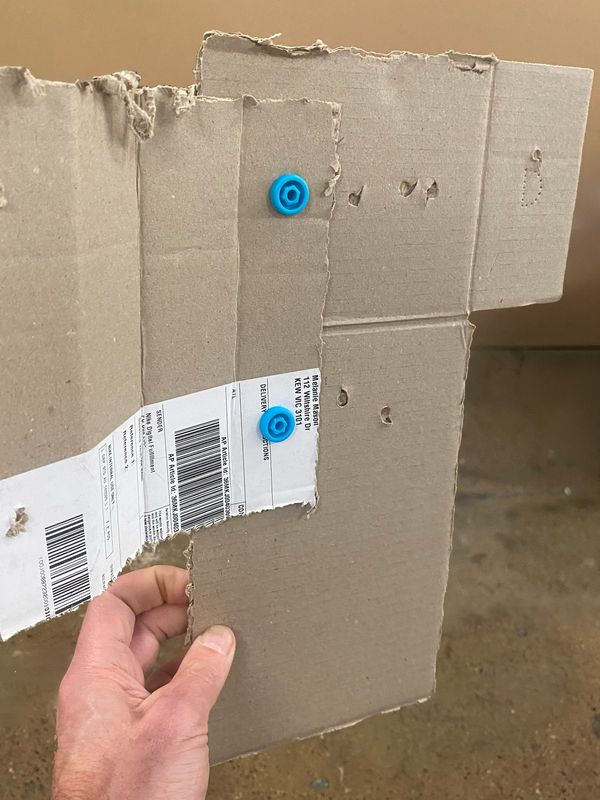
Cut the patch: Choose a patch that can extend across the weakened area in one direction. Here, we chose the Vertical direction for our patch.
Follow a pattern: Score three lines perpendicular to the flutes on your patch
Fold the rib: Fold along your scored lines - valley, peak, then valley so that a strong rib takes shape.
Connect: Attach on either side with 1-2 Scrus.
Super Tip!
Note: Try to position the rib across the weakest part of the surface for maximum effect. Here you can see a fold line from the original box is being strengthened by the rib patch.
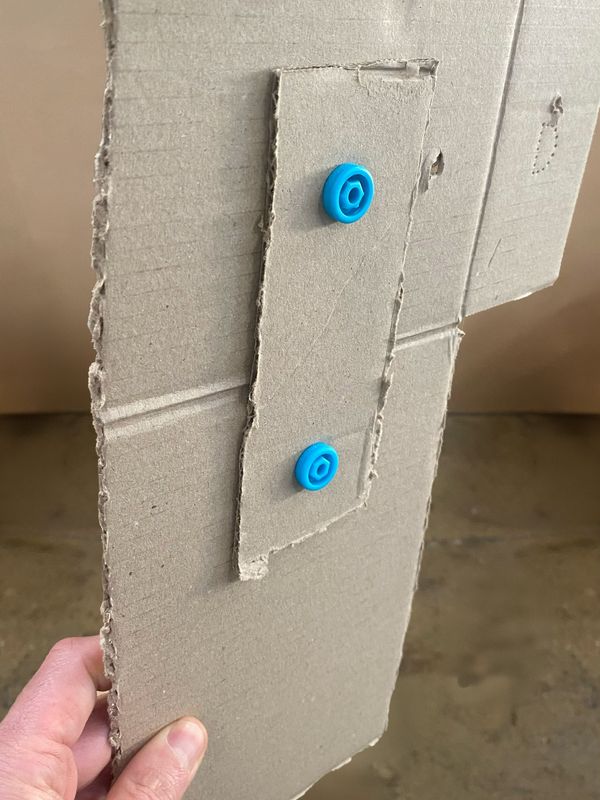
Adding Strong Joints: Triangular Folded Ribs
Do you need to make it even stronger than a folded rib? Try adding a folded triangle for maximum cardboard strength.
This uses the same pattern of scored fold lines, but instead of folding into a flat shape, first attach to the surface, then fold over and connect for super strength.
One advantage of adding strength in this way is that you create stable surfaces for attaching other structural components. Some makers also think this looks neater!
Can you think of other ways to use this technique to add strength? What other shapes could the rib be?
Folding the triangle rib
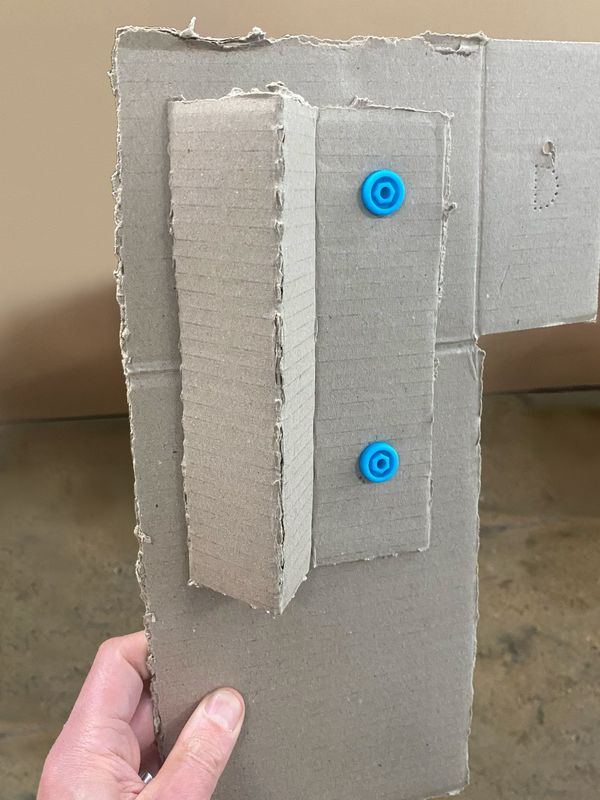
Cut the patch: Choose a patch that can extend across the weakened area in one direction. Here, we chose the Vertical direction for our patch.
Follow a pattern: Score three lines perpendicular to the flutes on your patch
Connect the patch: Attach it before the first fold so that the patch spans the weakened area.
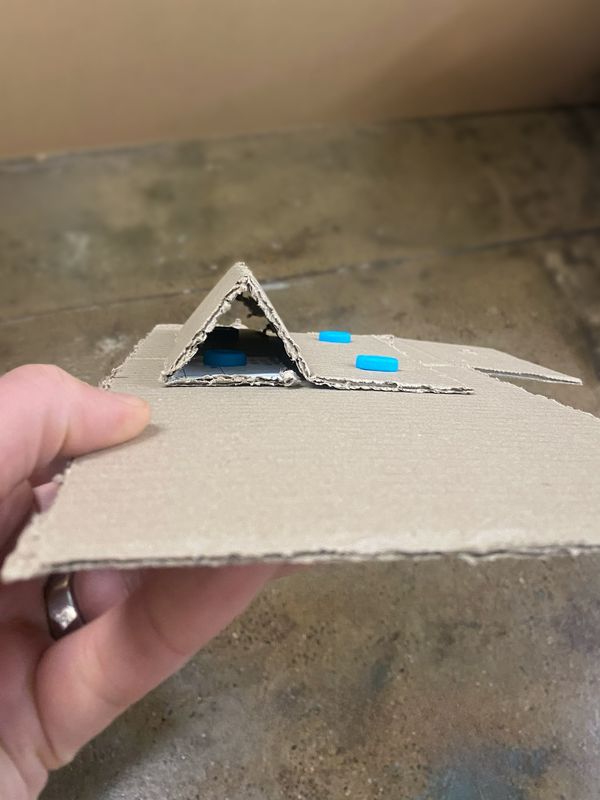
Wrap and connect: Wrap the patch around the connected Scrus, folding into a triangle shape. If you look from the end, it will resemble a pyramid. Then connect the last flap of your folded patch firmly to the surface.
Adjust and test: For each technique, try different sizes to see how large your rib needs to be. Sometimes a small or shallow rib can be very effective; other times you’ll need to make it longer or taller. With Makedo and cardboard, it is very easy to experiment!
Tip: Make sure your folds always have a minimum width of 2 Scrus (or 40 mm)